Try it yourself
We invite you to try Advanced Checks. TRY
Consumption via API
If you make use of the API visit this other guide where we explain its use.
Uso de evidencias tipo Checks vía API
Electronic evidence based on advanced explicit check
Viafirma allows you to add evidences based on the use of Advanced Explicit Checks. They will be useful to capture the user’s voluntary acceptances highlighting critical or specially important clauses or conditions, for example, those clauses recommended by GDPR, MIFID II, etc. <style>
You can add them directly from the visual policy designer to reference them from a unique policy identifier, or you can define it on the fly in your consumed service via API.
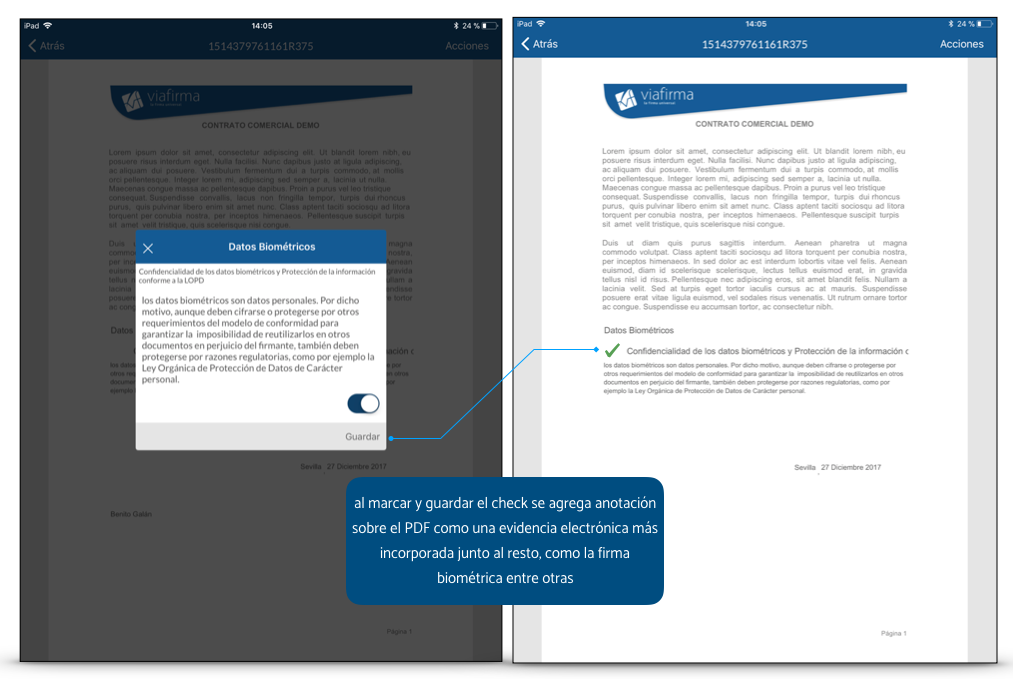
These evidences can be used both in face-to-face signature procedures, with the viafirma app, or in remote signature procedures, from any browser.
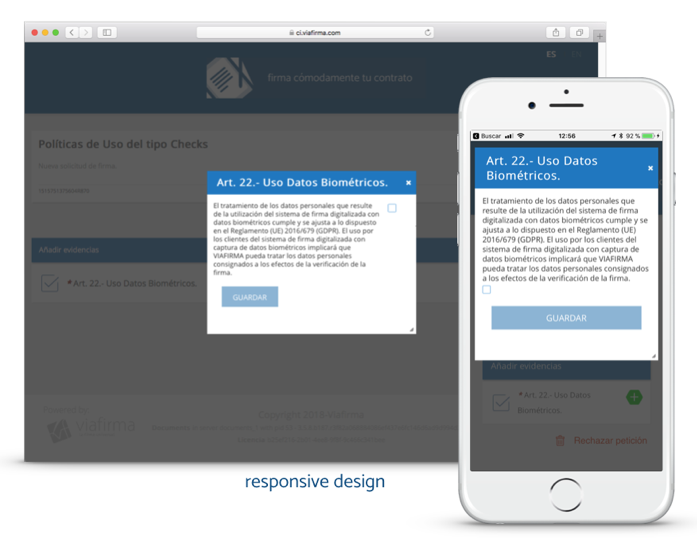
Use in remote signature procedures (web signature)

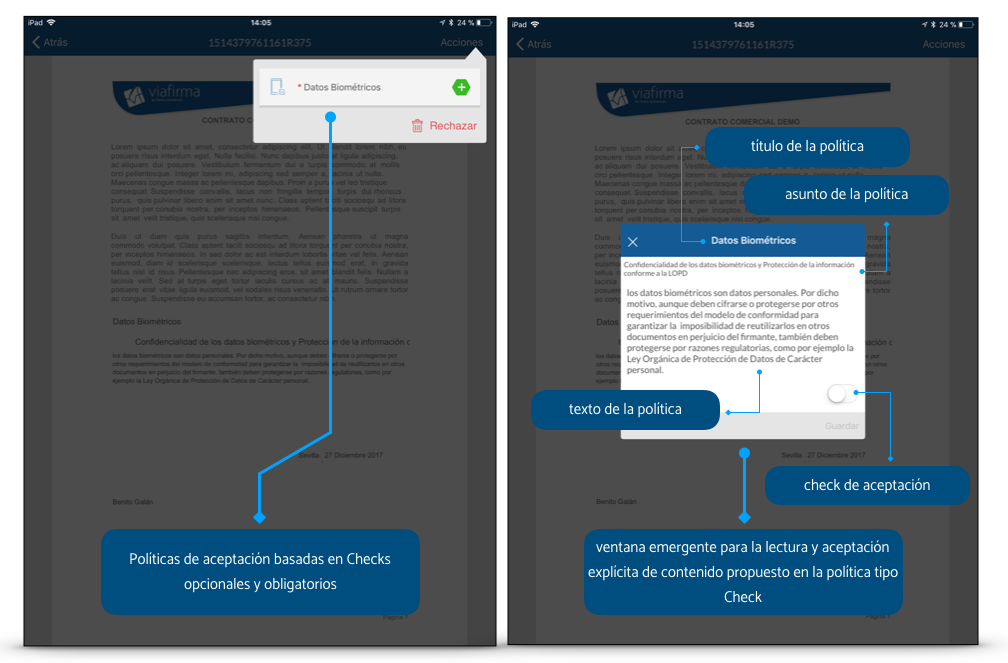
Use in face-to-face signature procedures (iOS/Android app)
How to set up evidence in the designer
The checks can be configured and managed from the visual designer of policies and evidences, available in the backend of viafirma documents. To do this, you only have to add a new evidence of the Check type and configure it.
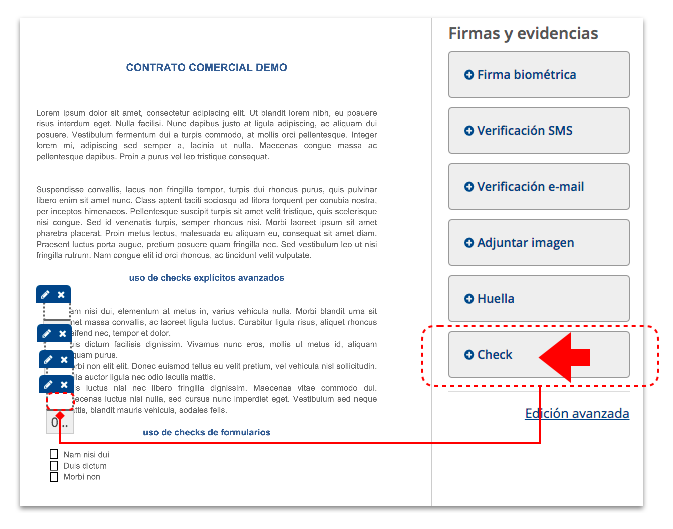
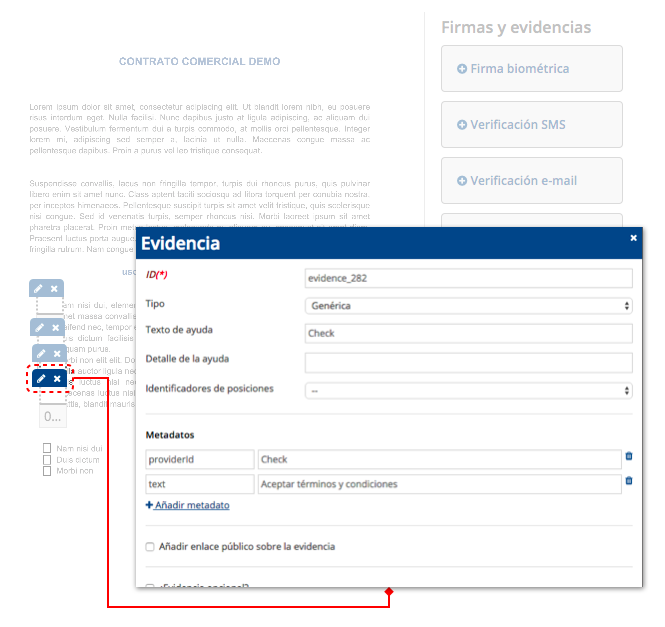
Once the evidence has been added, click on the edit icon to access the basic configuration.
Here are some basic settings for its use:
- ID: this identifier is automatically generated by the system for each piece of evidence, and will be used to define validation rules.
- Type: you can change the type of evidence: IMAGE,SIGNATURE,FINGERPRINT,GENERIC. For the CHECK type evidences that we are dealing with in this documentation we will use the Generic type.
- Help text: title of the Check that will appear in the action panel, for example “Personal data protection”.
- Help detail: additional text to incorporate contextual help of the check.
- Position identifier: if your PDF document has Acrofields type form fields, you can select it here, and we will use it to stamp the image associated to the Check.
- providerId: fixed value for this type of evidence that you should not change: Check
- text: complete content of the text that we associate to the check, for example the complete content of the clause on which we want to obtain consent.
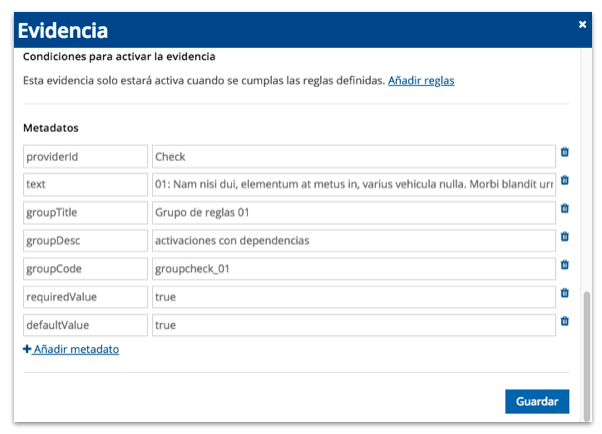
Metadata
By clicking on “Advanced Editing” you will be able to access more properties and usage options, as explained below.
Through this advanced metadata configuration you will be able to define the following properties and behaviors:
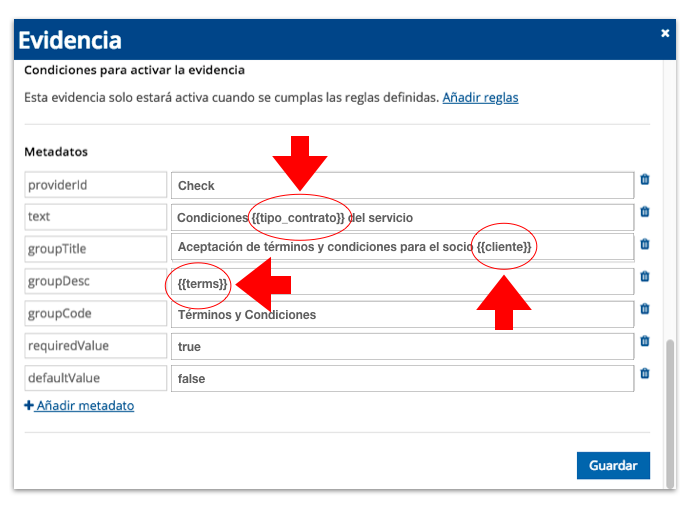
- text: text that we will show to the user associated to the check. The content of this text will be recorded as part of the evidence in the XML attached to the PDF along with other information.
- groupCode: only for grouped checks; it will allow you to identify the group of checks to which you want to associate your evidence.
- groupTitle: only for grouped checks; title of the group of checks, and you will be able to report it only in one of the checks that are part of the same group.
- groupDesc: only for grouped checks; description of the group of checks, and you can report it only in one of the checks that are part of the same group, for example in the evidence check where the metadata groupTitle has been defined.
- requiredValue: you can force the check to be enabled (true) or disabled (false).
- defaultValue: you will be able to report a predefined value (true or false); if the user does not access the evidence its value will be null.
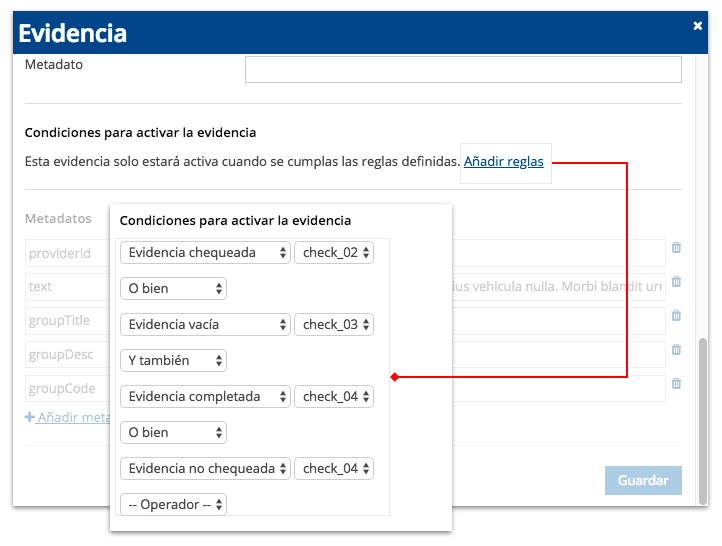
Validation rules
You will be able to add validation rules for the use of the CHECK, taking into account the value of other evidence incorporated into your policies.
For example: The clause “I authorize the use of my email for commercial communications“, will be enabled only if the clause “I want advertising” is checked.
You can nest as many validations as you wish, with “and/or” operators, and referencing the ID of any evidence included in the policies.
Other properties
You can also make use of other advanced properties that you may need in your signature processes, which are explained below.
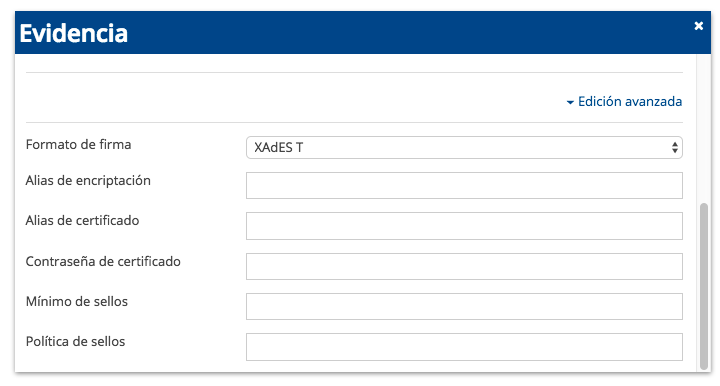
- Signature format: defines the signature format used for the XML where all the data captured for this evidence is consolidated. The following formats are allowed: XADES-B, XADES-T, XADES-LT, XADES-LTA; XADES_T format is recommended.
- Encryption alias: it is optional, by default a public encryption key defined in the system is used; it is used only in case you want to use a different encryption key.
- Certificate alias: it is optional, by default a certificate alias defined in the system is used, and it is used for the unattended signature of the document (PDF) as well as for the signature of the XML containing the evidence. In case you want to use another certificate for the signature here you must indicate the alias. This alias and certificate must be registered in the system.
- Certificate password: optional, by default the password of the default signing certificate is used. Use only in case of using a specific alias certificate.
- Minimum number of stamps: allows you to define a minimum number of stamps associated with the check on each page.
- Stamp policy: allows you to define a total number of stamps associated with the check of the entire document.
Dynamic properties
When using the policy and evidence designer you will be able to use dynamic properties, that is, you will be able to make use of values that you do not know yet but you can get them during the signature process, for example, from a form where you ask the user for the data, or through metadata if the signature process was launched from an external system, for example a CRM, making use of our APIs.
To do this you will only need to use the operators {{HERE_YOUR_VARIABLE}}, and its value will be automatically substituted if the variable is reported in the form or in the metadata.
Use of Checks type evidences via API
Try it yourself
We invite you to try Advanced Checks. TRY
Consumption via API
If you make use of the API visit this other guide where we explain its use.