
The following describes the basic steps to be taken to create a web application that instead of being deployed on the typical JEE stack, is deployed as another component within an OSGi container.

We will show how to build with Eclipse an OSGi bundle that using Jetty allows us to run a servlet on Equinox.
Create the base project
First, we will need to create a plugin, indicating that it is of type OSGI (Equinox implementation).

Definition of dependencies
Once we have the project created, we will need to declare the dependencies that our module will need in order to work as an application server. The dependencies will be at least:
- javax.servlet
- org.eclipse.equinox.http.jetty
- org.eclipse.equinox.http.servlet
- org.mortbay.jetty.server
- org.eclipse.equinox.http.registry

Construction of the example servlet
Once we have declared the dependent modules, Eclipse takes care of updating our classpath and we will be able to program our first servlet without compilation problems.
/** * Osgi Example Servlet. * */
public class HolaMundoOsgiServlet extends HttpServlet {

protected void doGet(HttpServletRequest req, HttpServletResponse resp) throws ServletException, IOException { System.out.println("Petición al Servlet OSGi");   resp.getWriter().append("Respuesta desde un Servlet Osgi"); }}
As we can see, this is a normal servlet, which should be mapped in the web.xml and deployed inside a servlet container.
Servlet activation
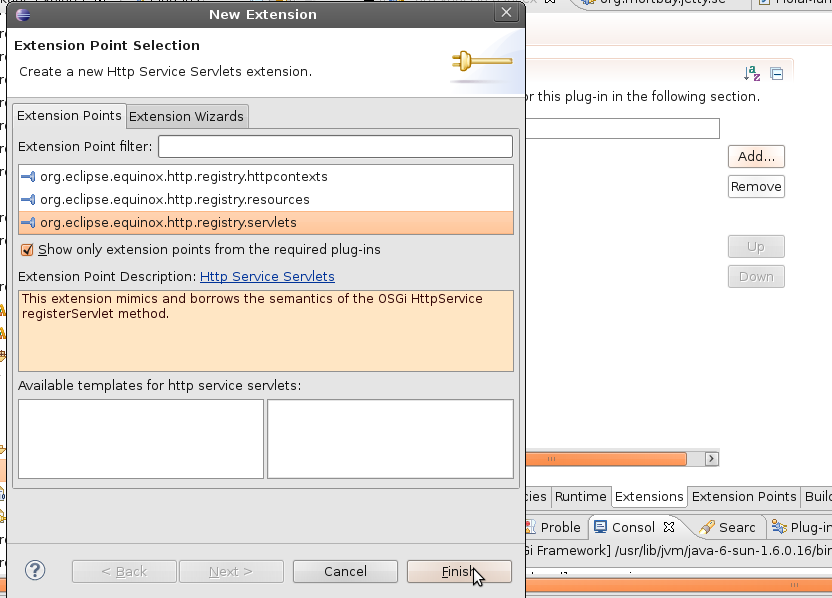
Unlike the traditional model (defined by the JEE specification), the servlet activation does not require any web.xml. Instead, we will define (like any other OSGI service) a new extension point of our application. To do this we will access the “Extension” tab and add the extension “org.eclipse.equinox.http.registry.servlet” to our module. With this we have indicated to OSGi that our module makes use of the Servlet container.
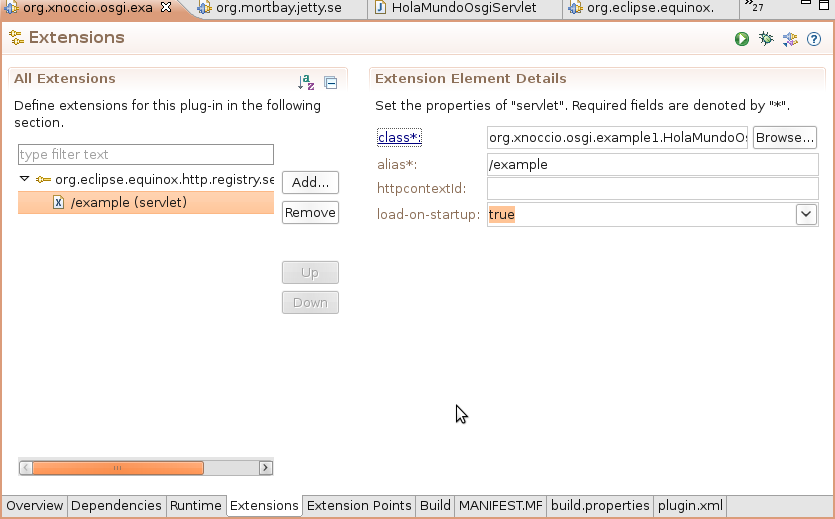
The next step will be to indicate the class that implements the new servlet and the mapping, for this we will simply define the alias and class property of the new servlet associated to the previously created extension.
With this we have our first OSGi web application.
Testing our application.
To test the application it is only necessary to execute the project (Run As…>OSGi Framework) and access with the browser to http://localhost:8080/exampleSi everything has worked correctly, in console we should see something like the following:
Persistence bundle started.
Activado módulo OSGi: Ejemplo OSGI!!
Activado Servlet OSGiProviderTracker: New service detected...
ProviderTracker: Added service org.eclipse.persistence.jpa.osgi.PersistenceProviderOSGi
Petición al Servlet OSGi
Although only a very basic example is shown here, OSGI has already proven to be very useful in very complex real projects.